18″ American Girl Doll Quilt

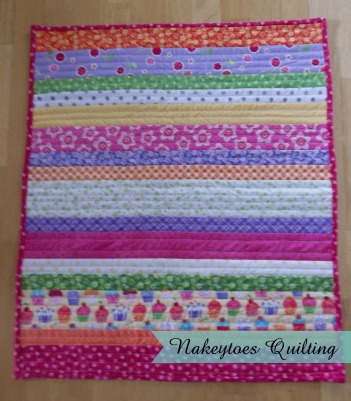
American Girl Doll Quilt all finishedMy daughter has been begging me to make her a quilt for her American Girl doll. I don’t know why I kept putting her off. This is one of the easiest and funnest (is that even a word???) projects ever. I had it done in an afternoon, including the binding.

I didn’t use a pattern, just looked at a lot of little girl’s bedding online. i had a basic idea of what I wanted, so I dug out the fabric. After ironing it I cut it into random strips 1 1/2″ wide to 2 3/4″ wide by 19 1/2″ wide. (I have no idea what I was thinking in regards to size.) Finished size is      19″ by 22 3/4″.

The first thing I did was to lay out the strips in random order until I got the look I was wanting.

Stitching them up took me about an hour with pressing between each row. I just started with the two strips at the top and worked my way down until the strips were all sewn together.

Once I had the rows all sewn together, I pressed a large piece of cotton for the backing and laid it out on my dining room table. I then layered a scrap of batting and the top, using 505 Spray and Fix by Odif USA to secure the layers.

For the actual quilting, I used a size 90/14 topstitch needle and King Tut #40/3-ply machine quilting thread in white from Superior Threads on the top and 50wt pink variegated Aurifil  (Bubblegum MK50 3660) on the bottom.  I did simple edge to edge straight-line quilting to keep things simple.

The quilting took me approximately 2 hours with starts and stops.

For the binding, I cut 2 inch strips across the width of the fabric and sewed them end to end. I double the fabric over lengthwise and pressed it.
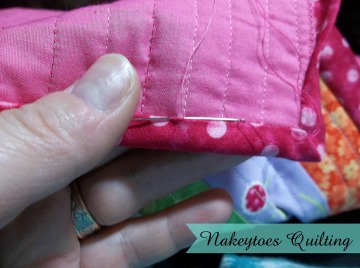
Hand sewing down the binding on the American Girl Doll QuiltPlacing the cut edges on top of the quilt sandwich with all of the edges flush, I stitched 1/4″ from the edge. Mitering the corners, I sewed all the way around. To join the ends I used the method in the video below.

I then proceeded to hand-stitch down the binding on the back side until it was finished.

I am very happy with the finished product and my daughter is thoroughly pleased that her American Girl doll has a quilt to match hers.

If you have made an American Girl Doll quilt, I would love to see it. Please leave me a comment and let know if you enjoyed making a small quilt.

Disclaimer: This post contains Amazon affiliate links from which I earn a (very) small commission when you make a purchase. Please consider supporting this site by clicking on the links. Thank you!

 

Rhubarb Pie Quilt Update

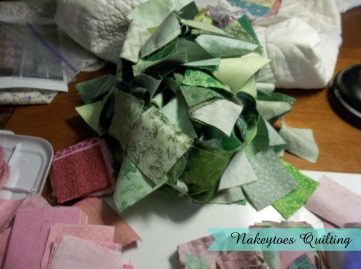
Rhubarb Pie is once again on the menu.  I have a nice chain of green patches to snip apart and I managed to start on the pink & green patches as well.

Rhubarb Pie Quilt green patches in a pile

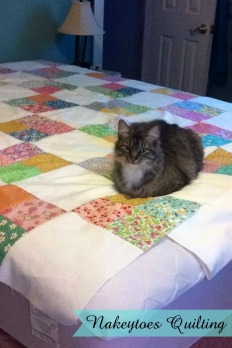
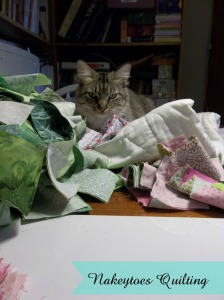
The serpentine quilting was going along nicely, but as usual I got busy and it’s sitting there taunting me. Pink Paws has claimed it as her spot while I either sew or type.

Pink Paws

Driving in a neighboring city, I happened to pass a quilt shop that I had heard about.  So of course I turned around and visited The Scrappy Quilter. What a nice surprise! It’s not a big shop, but they have carefully selected fabrics in the newest and trendiest lines. They have an almost complete selection of 50wt Aurifil (orange spool) and carry other machine quilting brands as well.

Rarely do I walk into a quilt shop and purchase several items without a list in hand. Impulse shopping is fun! Haha.

The Scrappy Quilter just happened to carry the small and medium sized See Your Stuff clear storage bags. I purchased the large one in lime green last summer and absolutely LOVE the thing. I love it so much I bought each of my sewing sisters one in different colors.  I digress. I bought the small one (6″x8″) as it’s perfect for carrying small sewing tools like my thimble, thread, needle case, etc.

One of the displays was of a quilt made with 1930’s fabrics. As y’all know, ‘30’s are my thing. Naturally I purchased the pattern. And the Tri-recs rulers to get the shapes used in the pattern.

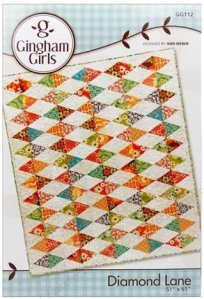
The pattern is from the Gingham Girls and is called Diamond Lane. You can purchase it from Diamond LaneCreate For Less  on clearance for 1/3 what I paid for it. (No affiliation, they just happened to have the cheapest price I could find.)

My final purchase was a product that I stumbled across in March, but hadn’t yet ordered from Amazon. I had seen Bosal’s In-R-Form Plus, a unique fusible foam stabilizer over at Crafty Gemini and it intrigued me.

Before I purchased the foam, I wanted real reviews and first-hand experience from quilters who had actually used the stuff so I put it out there to the Quilting group administrated by Carol Ann Ferrari-Rogers. Here are some of the responses I received:

“Love it! Used it in purses, some only on bottoms, but it makes them stand up!” – Connie G.

“I’ve used it for a tote bag. It’s awesome! Runs through the machine real nice and holds its shape very well.” – Monica E.

“I love it!! I use it on the chubby charmer pattern and the sides of my bag stand up on their own instead of just flopping over.” – Victoria L.

As soon as I make a project with it, you can bet I’ll write a post with photos.

I will be heading in that direction more often, so The Scrappy Quilter will definitely become my LQS (local quilt shop).

Do you have a local quilt shop that you would like to share? Or have you used the In-R-Form Pluse? If so, what was your experience with it?

Disclaimer: This post contains links to affiliate companies from which I receive a (very) small commission when you purchase something. Please consider supporting this page by clicking on the links. Thank you!
Rhubarb Pie, Serpentine Stitch & a Drawing

In mid-February I walked away from the job I held in the fabric department at Hobby Lobby in order to fulfill my role as housewife. Before y’all go feminist on me, it was MY decision, not my husband’s.  While working I didn’t have time for anything. Housekeeping, cooking, mothering, “wife-ing”, and quilting all took a backseat and my life became endless days of constantly running.

I was fulfilling the part of me that needed adult interaction, and the parts that needed to teach and to learn.

What I was losing, though, was precious time with my family. And I was losing my creativity. Weeks would go by without me touching my machine. For a Creative, that generates discontent, frustration, and angst.

It seems like forever since I have had a finish. I don’t have one this week, but I am making Pile of Rhubarb Pie Quilt Patchesprogress. Sunday I managed to stitch four neat little stacks of 2-patches for the beginnings of my Rhubarb Pie quilt. One of the Facebook groups that I used to Admin had a swap for the pinks and greens needed. You can purchase the pattern here at Bella Rose Quilts (I have zero affiliation, they were the first one that popped up with the pattern).

Last Saturday was our monthly Sit & Sew at my friend Jan’s house. She graciously allowed me to use her long arm frame to baste some quilts. I’m really terrible about getting pictures. However, I did manage to get three smallish (larger than crib, smaller than twin) quilts basted in about six hours. Go me!

Jan discovered this wonderful thread from Superior called Vanish Extra. You can purchase it directly from Superior or through Amazon Prime.  Vanish Extra is a water soluble thread that stitches up just like regular thread. Toss your quilt in the wash, and voilà, no more basting stitches. A word to the wise: Don’t lick your fingers to moisten the end of the Vanish Extra when trying to re-thread your needle. Haha.

Wednesday ended up being a sick day for Junior. She’s been fighting allergies and a nasty cold, and it finally settled in her ears. Poor tyke. So while she lounged around in her jammies reading on her Kindle, I had some unexpected free time to quilt. Wooohoooo!

19030s 4 patch with a little helper for Nakeytoes QuiltingAt some point this winter, I did have some free time to whip up this top. It was fast AND easy. A wonderful combination for someone who was missing their sewing time.

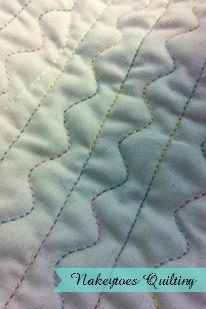
Detail of Serpentine Stitch in Variegated Thread by Nakeytoes Quilting 2016It’s just a simple 4-patch made with some 1930’s nickels that I had purchased online. It measures roughly 63”x81”. I had seen a picture on Pinterest and knew that I had to make it. Check out Mama Spark’s blog to see the original. I love the simplicity. And serpentine stitch is my new favorite quilting stitch. Throw in some pastel variegated thread, and you have quilting bliss.

As I said, it’s not done. By a long shot. I still have endless rows to achieve the look of the one in the photo. But I’m working on it. And I’m quilting. Finally.

As a side note, I am trying to grow my Facebook page Nakey Toes Quilting. Like, Share, and Comment on the pinned post to be entered in a drawing to win Fabulously Fast Quilts by Amy Smart.

Disclosure: This site uses links which lead to affiliate sites from which I make a (very) small commission. All comments and opinions are my own, and I refuse to promote a product which I do not like.

Rules for Quilting

It seems like every day there are new quilters wanting to know the “rules” of quilting. They want to know if it’s okay to do this or if doing it that way is allowed. What happened to our ability as artists & crafters to thumb our nose at the mainstream population and actually be creative?

One of the first things I figured out way back when I was learning to quilt, is that there are very few hard and fast rules for quilting. They are as follows:

  • Use a “scant” quarter inch. It REALLY does make a difference.
  • Test your marking utensils on scraps before writing on your pieces/tops.
  • For every quilter out there, there is a different method for doing things.
  • It doesn’t matter which sizing/starch you use, you will end up with the same result.
  • Not all quilting needles are created the same. Buy quality. Trust me.
  • Keep your coffee close, but your seam ripper closer.

When I asked my quilting friends what they considered to be the rules of quilting, the overwhelming response was: “There are no quilting rules”.

Quilting rules are for those without an imagination

There’s a popular saying amongst seasoned quilters.

“There aren’t any quilt police.”

It’s supposed to be a fun hobby. Yes, you need guidelines for the basics, especially if you are new to sewing. Just relax and let your creativity flow. I would imagine that Picasso and Monet had a few canvases that they painted over before they were satisfied with the final product.

It’s okay to make mistakes, to start a top and realize that you don’t like how it’s shaping up, and to curse when you’re frustrated with a new technique. We’ve all done it. Welcome to the sisterhood of quilters.

Do you have a quilting rule that you would like to share? What kind of absurd “rules” have you heard?


My Updated Quilting Bucket List

I have been gone most of the summer up north helping my parents and visiting as many quilt shops as I could squeeze in. I finally made it home two evenings ago and now I am sorting through my quilt purchases and attempting to create a blog organizer so that I can share with y’all the many wonderful things I saw on my trip.

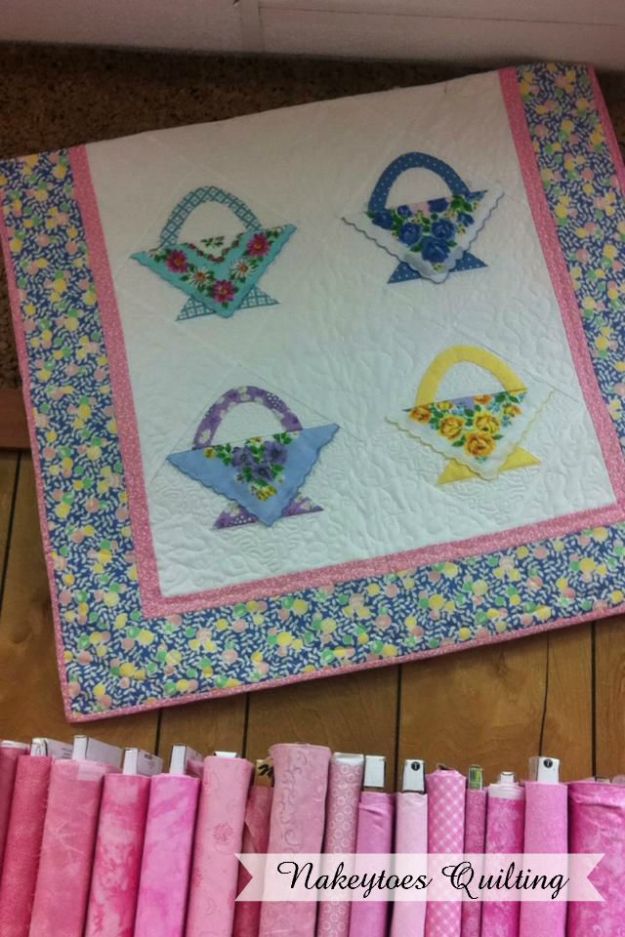
Vintage Hankie Quilt

While getting myself organized I updated my list of quilts that are in UFO stage, need to be quilted, or that I have the fabric sitting here waiting to be made up. The list is alarmingly long, so now that it’s hit the triple digit temperatures, it’s time to hibernate and sew.

UFO’s:
1. Farmer’s Wife Sampler Quilt
2. International Quilt Block Swap Sampler
3. Lemon Drops Turnover Swap
4. “For Anna” Stack & Whack
5. I spy
6. Pony Club Sampler x2
7. 1930’s Irish Chain
8. Junior’s Sweet Things quilt
9. 1930’s Grandmother’s Flower Garden
10. Diamond 4-Patch (need to finish hand-quilting it)

Needs to be quilted:
1. Autumn Squares
2. Herringbone Scrappy
3. 1930’s Baby Butterfly
4. Ben’s quilt
5. Red & Tan Double Stack Layer Cake
6. Red & Aqua Christmas jelly roll race
7. 1930’s Grandmother’s Fan
8. 1930’s 9-Patch
9. 8 Point Star
10. Dresden Plate

Want to Make (In no particular order):

1. Beach Fabrics Chevron (I plan to make it similar to the one in Jenny’s video)


2. Green Blog Quilt
3. 1930’s Pink with 2 1/2″ squares
4. Farmer’s Market Baskets (my inspiration is at Crooked Tail Crafts)
5. Farfalle (birthday gift from a great friend)
6. Rhubarb Pie Quilt
7. Scrappy Trips
8. Amish With A Twist kit
9. Amish with a Twist II kit
10. Modern Vintage
11. Hearts/Valentine’s Quilt
12. Christmas Granny Squares
13. Batik Shadows
14. Green Irish Chain
15. Nautical Quilt with a Mariner’s Star
16. Pink Paris novelty fabric using Shenandoah Quilt Pattern
17. 1930’s Periwinkle
18. Thanksgiving Strips (no pattern decided, suggest one???)
19. 1930’s Butterfly (can be found on McCall’s Quilting website)
20. Dancing Leaves flannel kit (pattern can be purchased here)
21. Yellow Strips Chevron quilt
22. “For Emma” using 1930’s strips from a swap
23. Patriotic strips quilt
24. Patriotic squares quilt
25. Lemon Meringue Pie
26. Stolen Rainbows
27. Batik Strips
28. Flying Geese
29. Taffy Treats
30. 2014 Texas Row by Row
31. 2015 Row by Row
32. Tropical Squares

How many quilts are on your bucket list? Are there any on the list that really challenge you? Please share in the comments.


A Kaffe Fassett Placemat

In January my local quilting group went on retreat to the Texas Gulf Coast and stayed in the beach front home of a relation to one of our group. It was decided that we would each make an ocean-themed place mat for the homeowner as a thank-you for allowing us to spend such a wonderful, peaceful weekend in her home.

It was also decided that our fabric medium would be Kaffe Fassett fabrics which sort of resemble sea life. Fabrics which threw me totally out of my comfort zone. But I’m fairly pleased with the result.

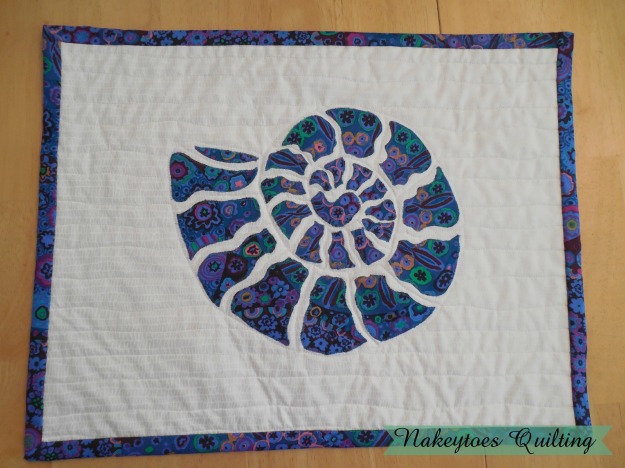
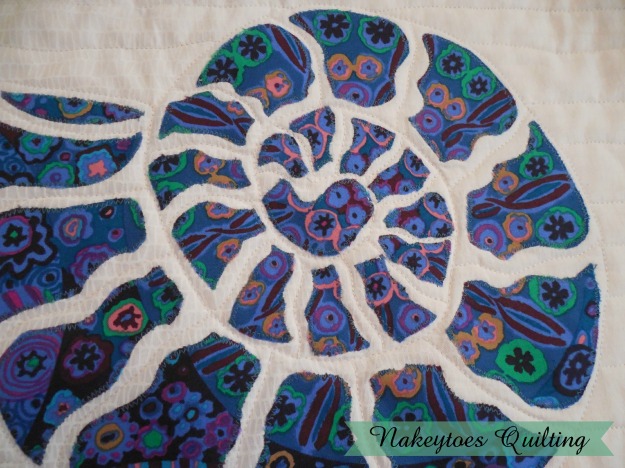
Nautilus

The first thing I did was scour the internet for art of ocean life to get an idea of what I wanted. Miss Mary Lou, the owner, had several shell collections throughout the house and I had the idea of a nautilus floating in the back of my mind. This step was actually the easy part.

Next, I sketched out a pattern and enlarged it to a size that would be to scale on the background fabric. I made two copies. With a clear tote and a strand of Christmas lights I made a makeshift light box and traced the nautilus pattern on to the paper side of Heat & Bond. Using a hot iron, I then attached the fabric to the Heat & Bond, following the instructions given with the interfacing.

Using some sharp pointed embroidery scissors, I cut the appliques out. This took a bit of time as there were quite a few pieces involved.

Placing the background fabric over the pattern on the light box, I then laid the applique pieces on the background fabric and double checked my arrangement. Very carefully I carried the arrangement over to the ironing board and proceeded to iron the appliques on, being sure to melt the glue for a firm bond.

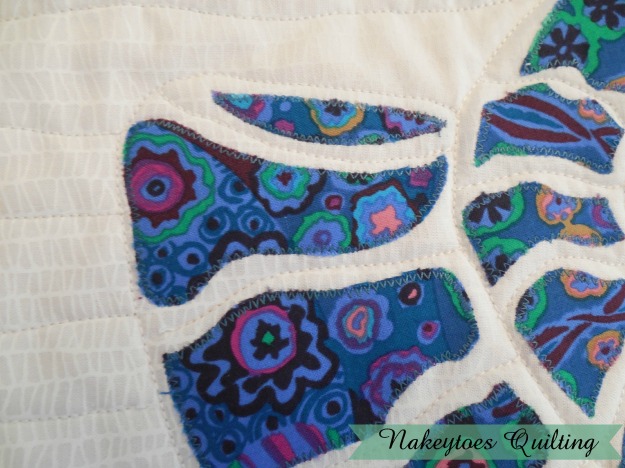
When that was done, I found a coordinating spool of Aurifil and using a tiny zig zag stitch, appliqued the pieces in place. I was delighted with the result.
Nautilus Detail

But then came a bit of second-guessing my choice. The others had begun to show pictures of their place mats and mine was so simple in comparison. I’m also not a machine quilter and the other members do exquisite work. Their place mats are serious pieces of art. Stunning.

So I spent several weeks debating whether or not to try and add something to my work. I finally had to make a choice and I chose simplicity. I’m a simple person, and this place mat is a reflection of me.

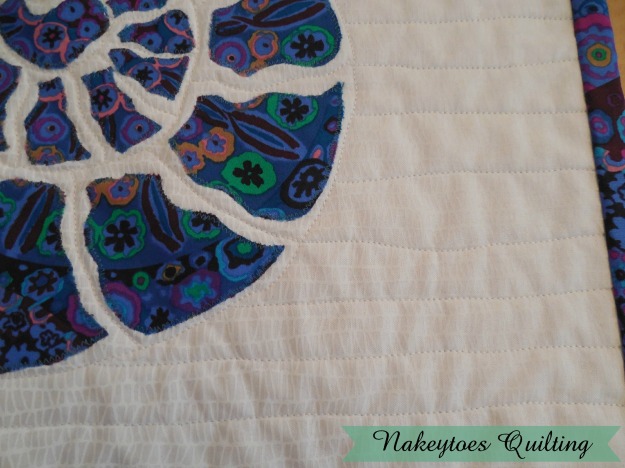
This past Sunday I laid the place mat top on some Quilter’s Dream batting that I had on hand, and using white Superior machine quilting thread, a size 14 top-stitch needle, and my Brother PC8500 with the “J” foot, I quilted it.

I had used a water-soluble marker and traced around and between the nautilus appliques to outline it.
Applique Detail

The background fabric had wavy lines vaguely resembling sea sponges, so I just randomly followed every third or fourth line and the effect was similar to ocean currents.

Quilting Detail

I couldn’t believe how quickly the quilting went. I think I only spent about two hours at the machine. It took me longer to stitch down the binding.

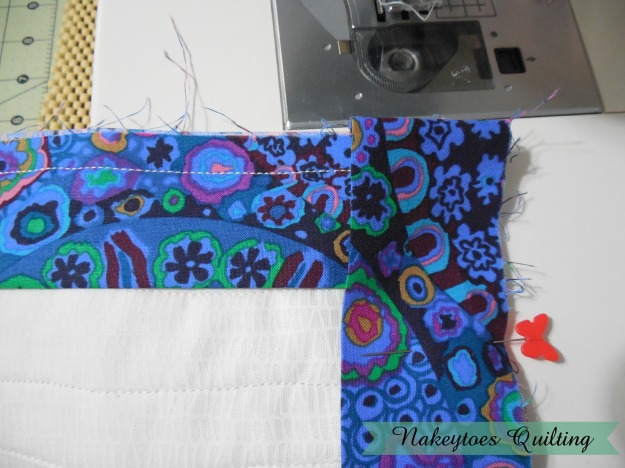
I wanted a wide binding to sort of “frame” the piece. So I cut 3 1/2″ strips, folded them in half and lined up the cut edges with the edge of the mat. I then stitched a half inch away from the edge, giving me a 1/2″ binding. I made mitered corners and hand stitched the binding to the back. It gave me a chance to use my new Clover binding clips (here) which I LOVE, LOVE, LOVE.

Binding_Kaffe

The finished piece measures out at 14” high and 18” wide.

Nautilus

What do you think? Would you put this on your table?

Linking up with My Quilt Infatuation and Sew Fresh Quilts.

Blessings!
Melissa

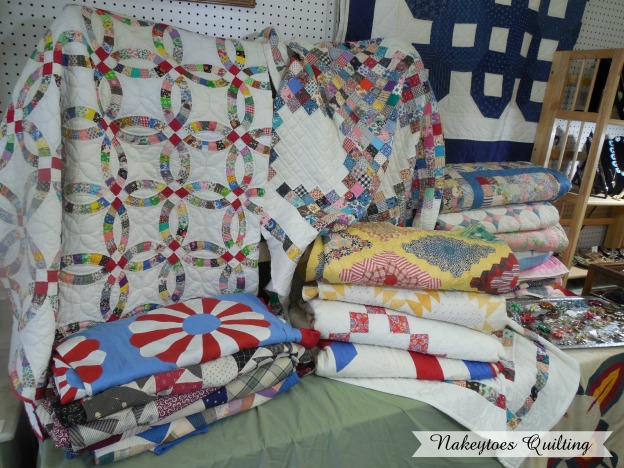
vintage quilts

If You Want to Collect Vintage Quilts…

Texas Antiques Week is the place to find them. Over the course of the last three weeks, the bi-annual Texas Antiques Week has been a happening place. I was able to attend this past Wednesday and had such a great time I can’t wait until the fall session. I shopped and walked the equivalent of a two block circuit and by the end of 2 ½ hours I was so exhaustipated that I couldn’t shop any more. I arrived close to 9:30 am and by noon my head was swimming and everything was beginning to look the same.

What is Texas Antiques Week you ask? It is actually three weeks of one of the largest antiques and home decorating flea markets in the country. Spanning roughly 8 miles between the Round Top and Warrenton communities, it is a picker’s heaven. If you are into DIY, antiques, home decorating, quilting, or collecting anything imaginable, then you need to travel here and plan to spend a whole week.

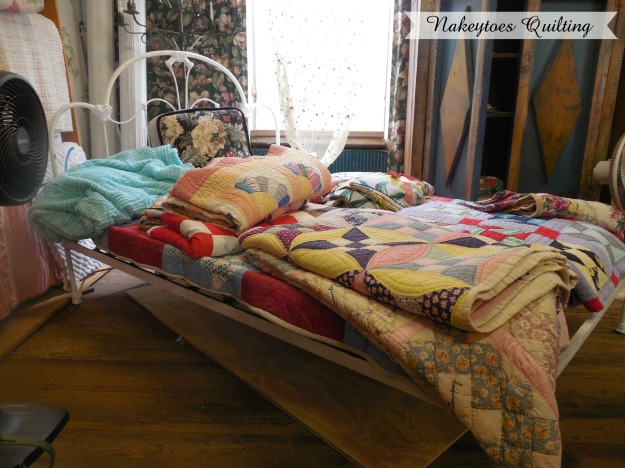
More_Vintage_Quilts
In the short distance I was able to shop, there were antiques, vintage linens, vinyl fabrics, yard art, metal art, gorgeous hanging baskets, homemade soap, local wines, specialty lighting, quilts, glassware, military ephemera (read bomb casings ), and cast iron cookware.

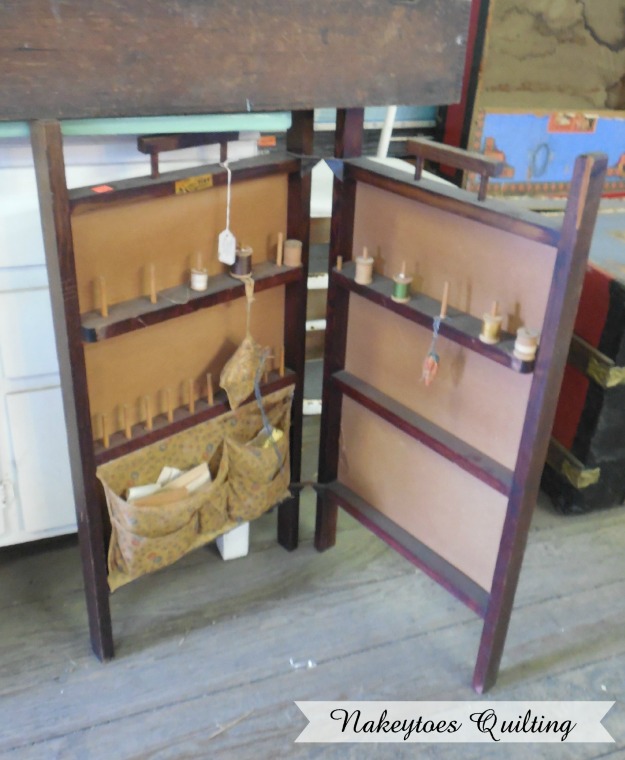
SpoolCase
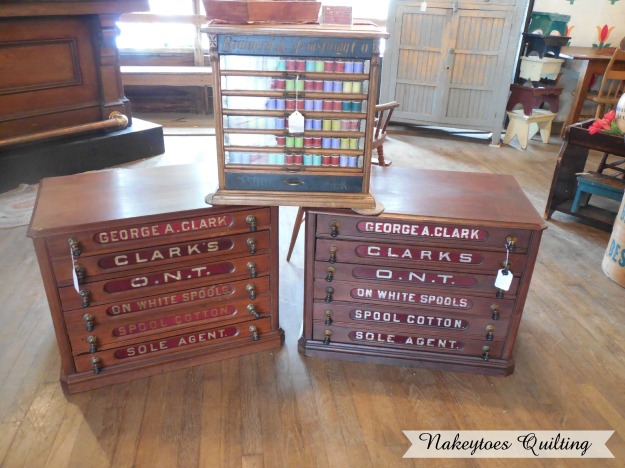
Below are a few pictures of vintage sewing items that I found while wandering. The prize was a large Coat’s Thread Case in the shape of a giant spool. It was sold and wrapped in protective plastic wrap. I spoke with the vendor, Rick Coffin of Country Folks Antiques, and he’s been dealing in antiques for over 30 years and it was only the 2nd one he had ever seen. I wish the pictures were more clear, but you get the idea. This same vendor had several wooden thread cases in pristine condition. He told me that most people use them as end tables. ACK!

Coats_thread_casesPicMonkey Collage2
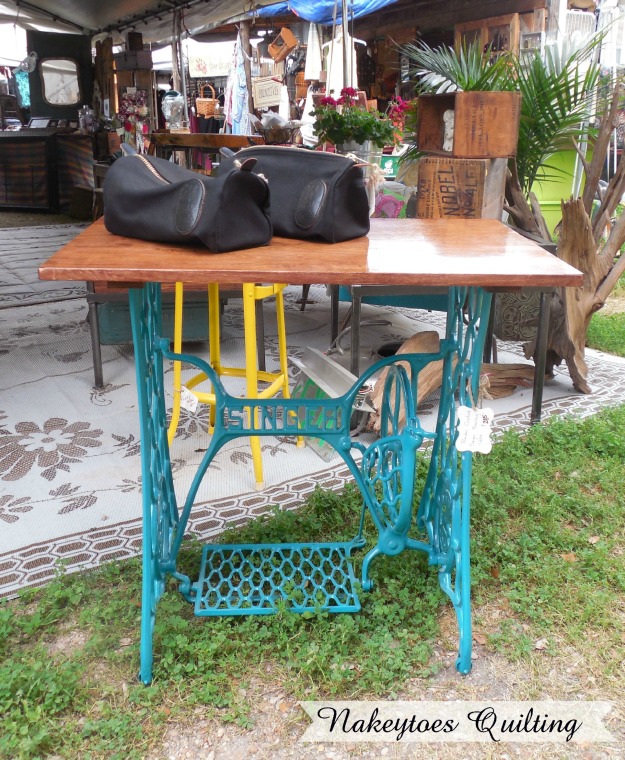
I was a bit disappointed that I didn’t see more vintage machines. The ones I did see were horribly rusty and every one of them was missing the bobbin case. Below is a photo of a treadle base that had been powder coated and a new top put on.

TreadleTable
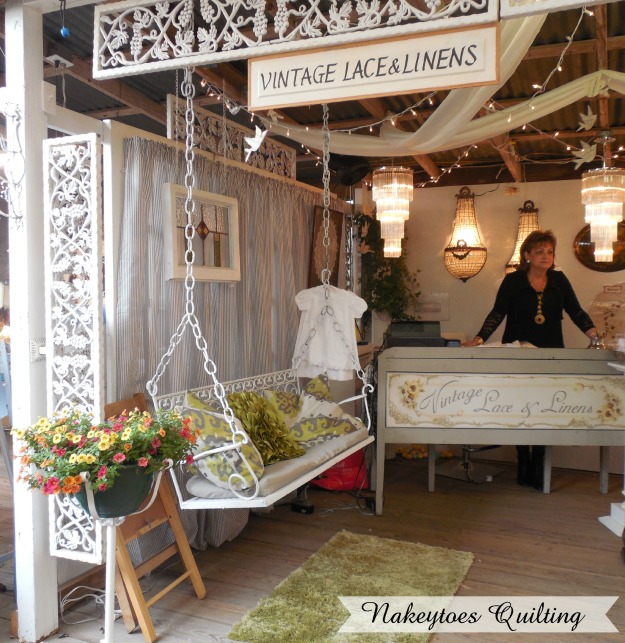
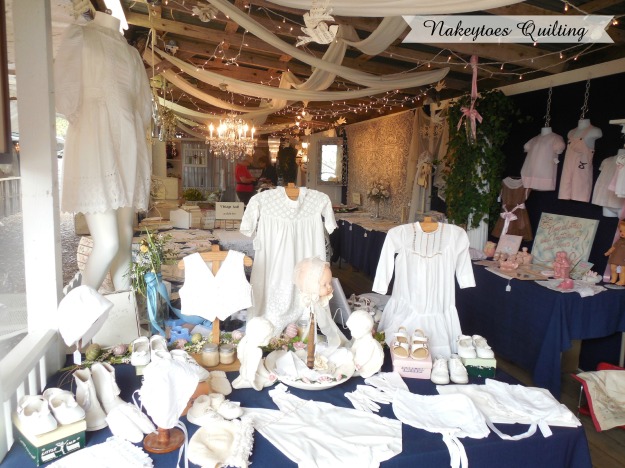
Of all of the tents and booths that I went in, Vintage Lace & Linen of Kerrville, TX was my favorite. With a very feminine shabby chic feel, the displays were warm & inviting. I was awed by the darling handmade children’s garments, the chandeliers, and lace. Janyce Karcher, the proprietress, was so sweet and patient while she answered my questions. This was the shop’s 10th year at Antiques Week, and I will be back in the fall.

VintageLace VintageLace2
With as many wonderful things as I saw in Warrenton, I only found two to purchase. The first was a small train case in impeccable condition. I plan to make a traveling quilting kit with it. The second item was The Complete Book Of Sewing: Dressmaking and Sewing for the Home Made Easy, copyright 1943. For me, this was a gem because it has information on altering clothing and making slipcovers. And the bonus was a section on teaching your daughter to sew.

If you are interested in attending the fall show, it will be September 28 thru October 3, 2015. I hope to see you there!

Blessings!
Melissa

April Showers Savings Sale Plus Coupons – Get $5 Off on Entire Purchase up to $30 or more by using code: AYHTH. Get $10 Off on Entire Purchase up to $50 or more by using code: AYFTN. Get 15% Off on Entire Purchase by using code: AYWFT at HancockFabrics.com. Standard exclusions apply. These coupons are valid through April 13th.

Raw Beet Salad and Homemade Dressing

The flu was rather brutal on this household this month. I spent 10 days in bed and began to wonder if I was ever going to be able to breathe without chest pain again. When I finally made it back into the kitchen, I knew we needed something healthy to purge our liver and fresh that didn’t taste like chicken noodle soup. My husband was hankering for fresh beets, so this is what I chose to make.

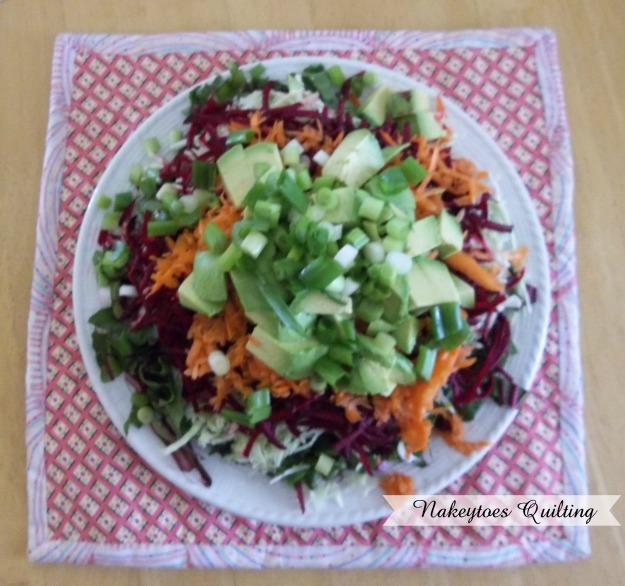
Raw beet salad

What you will need:

2 medium beets with greens scrubbed and rinsed
1/2 small head cabbage
2 carrots, scrubbed
1 avocado
1 bunch green onions, cleaned and chopped

Dressing:

1/2 c walnut oil (or oil of your choice, unrefined coconut does not work well)
1 lemon, juiced
1 tsp. Bragg’s Liquid Aminos
1/2 tsp minced garlic
1/8 tsp fresh cracked pepper
Salt to taste

For the dressing, simply whisk all ingredients in a glass measuring cup and let the flavors blend while preparing the salad. Pour into a cruet or simply leave in the measuring cup to serve.

For the salad, first, chop your beet greens into bite size pieces and lay them on a plate. Using a food processor and a shredding blade, grate cabbage, beets and carrots, layering them on top of the beet greens.

Then cut your avocado in half lengthwise around the pit. Twist in two. Using a knife, and holding the first half of the avocado, gently slice through the avocado meat. Use a spoon to scoop it out of the shell and place on top of the grated carrots. Repeat with the other half.  Sprinkle green onions on top. Serve

Makes 6-8 servings as a side dish.

1930's Hexagons

Hexie Progress

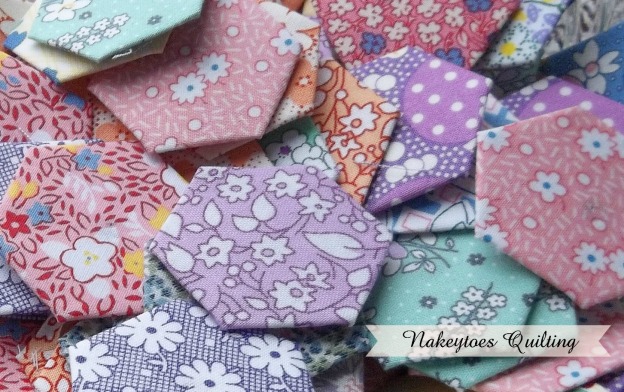
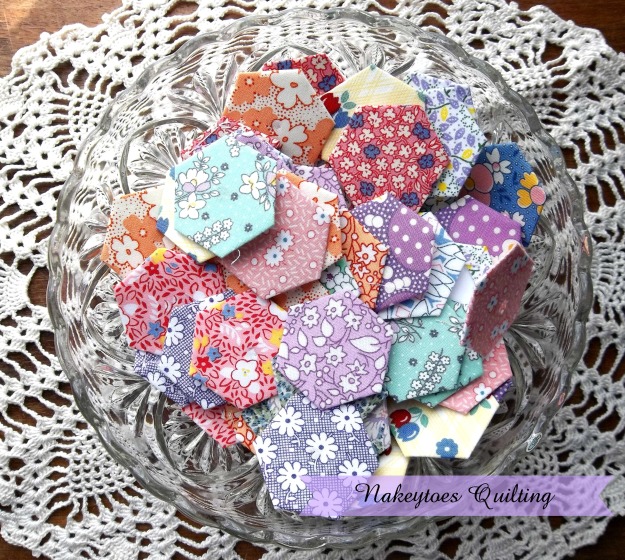
It’s been a slow couple of weeks for me, but I did manage to create some more hexagons for my Grandmother’s Flower Garden. Our household was hit rather hard with the flu this month and I spent several days in bed watching Poirot on Netflix, surfing Pinterest and just plain sleeping. But the end result is a bowl full of hexies.

Quilting Hexagons in a bowl

This is a project that will take me quite some time to complete. I have dozens and dozens of white hexagons to make as well as the green ones to make the garden path, but it’s a good start.

Blessings!
Melissa


120x240 Spring Fling Sale plus Coupons - Ends April 1st